
Small trash bins in bathrooms, home offices, and craft rooms are often functional but visually forgettable. A crochet decorative trash bin organizer offers a simple way to transform a plain plastic or metal bin into something that fits the room’s décor, without spending money on a replacement. This guide covers planning, construction, and finishing techniques for wrapping or building a crocheted cover that stays secure through daily use.
Why Crochet a Trash Bin Cover
There are a few practical reasons this project has stayed popular among home crafters, beyond simple aesthetics.
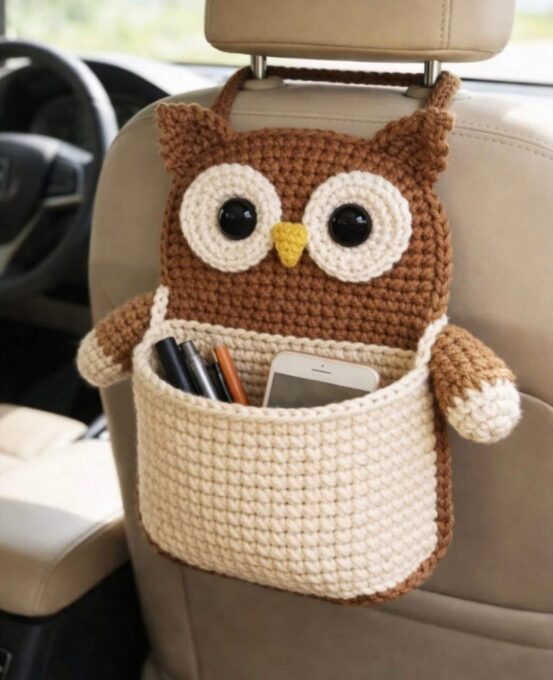
- It hides mismatched or worn plastic bins without buying new ones.
- It adds texture and color coordination to small rooms like bathrooms or nurseries.
- A well-fitted cover can be removed and washed separately from the bin itself.
- It’s a manageable project size, often finished in one or two sittings depending on bin height.
Because this project wraps around an existing object rather than forming a free-standing structure, measuring accurately at the start saves significant time later.
Materials Needed
| Item | Recommended Type | Notes |
|---|---|---|
| Yarn | Worsted weight cotton or cotton-blend | Cotton resists sagging better than pure acrylic over time |
| Crochet hook | 4mm–5mm (G–H) | Adjust based on yarn thickness and desired drape |
| Measuring tape | Flexible | For circumference and height measurements |
| Stitch markers | Any style | Useful for tracking rounds |
| Yarn needle | Blunt tip | For seaming and weaving in ends |
| Elastic thread (optional) | Thin, stretchable | Can be worked into the top or bottom edge for a snugger fit |
A cotton-blend yarn is often a good middle ground here, offering more drape than pure cotton while still holding shape better than 100% acrylic, which can stretch out of shape over months of use. For general guidance on fiber properties and care, the Craft Yarn Council’s yarn standards and care guide is a trusted reference used widely across the crochet community.
Measuring the Bin
Before choosing a stitch pattern, take the following measurements from the actual bin being covered.
- Circumference at the base, middle, and top opening — many bins taper slightly, so a single measurement isn’t always accurate.
- Height, from the floor to the rim.
- Shape type — cylindrical, tapered, square, or oval bins each require slightly different shaping approaches.
For tapered bins, it helps to note the difference between the base and top circumference, since the crochet piece will need gradual increases or decreases to match that same taper.
Choosing a Construction Method
There are two common approaches to this project, and the right one depends on the bin shape and desired final look.
Method 1: Worked-in-the-Round Sleeve
This method creates a seamless tube that slips directly over the bin, similar to a fabric sock.
- Best suited for cylindrical or gently tapered bins.
- Worked continuously in rounds from base to rim.
- Requires accurate gauge matching to avoid a sleeve that’s too loose or too tight.
Method 2: Flat Panel Wrap
This method crochets a rectangular panel that wraps around the bin and seams at the back or side.
- Better suited for square or irregularly shaped bins.
- Easier to adjust mid-project, since the panel can be tried against the bin before seaming.
- Allows for a visible seam detail, which some crafters use decoratively with contrasting yarn.
Step-by-Step: Worked-in-the-Round Method
Step 1: Foundation Chain
Chain a length matching the bin’s base circumference, plus one or two extra stitches for ease. Join with a slip stitch, taking care not to twist the chain.
Step 2: Establishing the Base Round
Work one round of single crochet into each chain stitch. This becomes the reference round for gauge — if the fit feels too loose or tight here, it’s worth adjusting hook size before continuing.
Step 3: Building the Body
Continue in single crochet rounds, working through both loops, until reaching roughly two-thirds of the bin’s height. For tapered bins, gradually decrease stitch count every few rounds by working two stitches together at even intervals, following the natural taper measured earlier.
Step 4: Upper Body and Rim
Switch to a slightly looser stitch, such as half double crochet, for the last third of the sleeve if a bit more stretch is needed to slide the piece over the bin’s widest point (often the rim). Finish with a round of slip stitch or reverse single crochet for a clean, non-curling edge.
Step 5: Fit Check
Before weaving in ends, slide the sleeve over the bin to confirm it sits correctly. Minor adjustments, such as adding a round or two, are easier to make before final finishing.
Step-by-Step: Flat Panel Method
Step 1: Foundation Row
Chain a length matching the bin’s circumference plus a small seam allowance (roughly 2–3 cm). Work the first row in single crochet.
Step 2: Building the Panel
Continue in straight rows until the panel reaches the bin’s height. Turning chains should stay consistent to keep the panel’s edges straight rather than curved.
Step 3: Seaming
Wrap the finished panel around the bin and pin the two short edges together with stitch markers before seaming. A whip stitch or slip stitch seam works well for a flat, low-profile finish.
Step 4: Optional Base Panel
For bins that will be viewed from above, a matching circular or square base panel can be crocheted separately and stitched to the bottom edge of the wrap for a fully finished look.
Securing the Cover in Place
A cover that shifts or slides off during use quickly becomes more annoying than decorative. A few methods help keep it secure:
- Elastic thread worked into the top or bottom edge creates a snug, sock-like grip.
- A drawstring threaded through eyelets near the rim can be tightened and tied.
- Double-sided fabric tape (removable type) placed discreetly on the inside base, for bins where a slightly more permanent hold is acceptable.
The right method depends on how often the bin needs to be emptied and whether the cover should be removable for washing.
Common Mistakes to Avoid
| Mistake | Result | Fix |
|---|---|---|
| Skipping the taper measurement | Cover doesn’t sit flush against the bin | Measure base, middle, and top separately |
| Using a hook too large for the yarn | Loose, saggy fabric | Size down for a firmer, better-fitting cover |
| Not checking fit mid-project | Cover too short or too tight at the rim | Try the piece against the bin before finishing |
| Ignoring the bin’s opening width | Sleeve won’t stretch over the rim | Add stretch (half double crochet or elastic) near the top |
Styling Ideas
This project pairs naturally with other small home organization pieces made from matching yarn. Ideas include:
- Matching a bathroom trash bin cover with a coordinating tissue box cover
- Adding a contrasting rim or base band in a second color
- Using a textured stitch, such as shell stitch or bobble stitch, for visual interest on flat panel designs
For readers building out a full set of crochet home organizers, this project pairs well with the crochet lighter and match holder basket pattern, since both use similar cotton yarn weights and focus on practical, everyday storage solutions.
Frequently Asked Questions
What size bin works best for this project? Small to medium bins, typically under 30 cm in height, are the most manageable for a first attempt, since they require less yarn and fewer rounds to complete.
Can I use this pattern on a metal trash bin instead of plastic? Yes. The construction method is the same regardless of material, though metal bins tend to have straighter sides, which can simplify the shaping process.
How do I know if I should use the round or flat panel method? Cylindrical or gently curved bins generally work better with the round method, while square or irregularly shaped bins are easier to fit using a flat panel wrap.
Will the cover get damaged by items being thrown away? Since the cover wraps the outside of the bin rather than lining the inside, it typically stays clean and undamaged during normal use.
Can this cover be removed for washing? Yes, especially if secured with elastic thread or a drawstring rather than adhesive. Hand washing and reshaping while damp is recommended for cotton yarn.
Is this a good beginner project? Yes, particularly the flat panel method, which only requires straight rows of single crochet and a simple seam, making it accessible for someone with minimal crochet experience.