

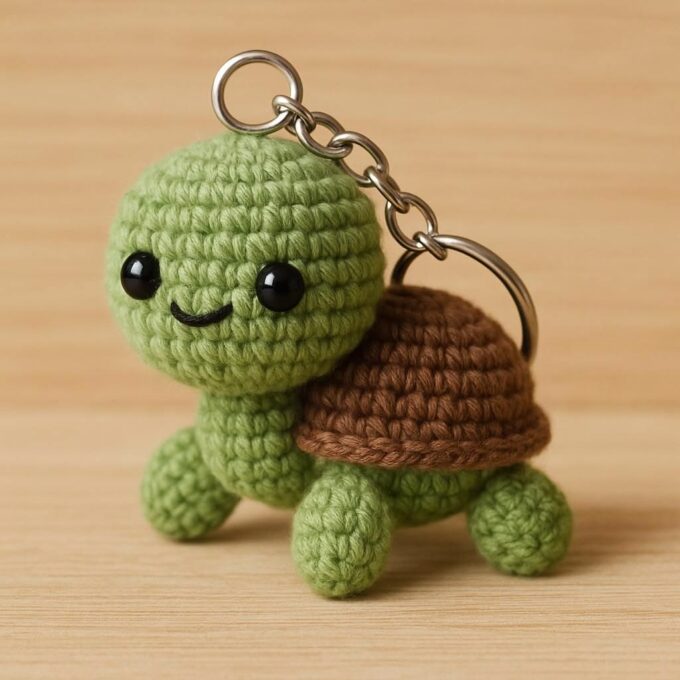
There is something about a tiny turtle amigurumi that never goes out of style. Maybe it’s the round shell, the stubby little legs, or the fact that it fits in the palm of your hand — whatever it is, this mini turtle amigurumi pattern has become one of my most-requested designs, whether it’s for a keychain, a desk companion, or a quick handmade gift. It works up in under two hours, uses minimal yarn, and is forgiving enough for a confident beginner to tackle.
This guide walks through the full pattern, from materials to finishing touches, so you can crochet your own mini turtle from start to finish.

What You’ll Need
- Worsted weight yarn in green (shell) and a lighter shade like cream or tan (body)
- 3.25mm crochet hook
- Small amount of polyester fiberfill
- 6mm safety eyes
- Yarn needle
- Stitch marker
- Small scissors
The finished turtle measures approximately 3 inches long, making it a genuinely quick project. If you’re unsure about any of these supplies, our full breakdown of essential amigurumi tools at <a href=”/essential-amigurumi-tools” style=”color:red;”>this guide</a> covers what each one is used for and how to choose the right version.
Abbreviations Used in This Pattern
| Abbreviation | Meaning |
|---|---|
| MR | Magic ring |
| sc | Single crochet |
| inc | Increase |
| dec | Decrease |
| st(s) | Stitch(es) |
| rnd | Round |
If any of these feel unfamiliar, our guide on how to read amigurumi patterns at <a href=”/how-to-read-amigurumi-patterns-easily” style=”color:red;”>this article</a> breaks down exactly how pattern shorthand works.
Shell (Make 1 in Green)
- Rnd 1: 6 sc in MR (6)
- Rnd 2: inc x6 (12)
- Rnd 3: (sc, inc) x6 (18)
- Rnd 4: (sc2, inc) x6 (24)
- Rnd 5–7: sc around (24)
- Rnd 8: (sc2, dec) x6 (18)
Fasten off, leaving a long tail for sewing. Lightly stuff the shell before setting it aside, keeping it soft enough to flex slightly for shaping later.
Body (Make 1 in Cream/Tan)
- Rnd 1: 6 sc in MR (6)
- Rnd 2: inc x6 (12)
- Rnd 3: (sc, inc) x6 (18)
- Rnd 4–5: sc around (18)
- Rnd 6: (sc4, dec) x3 (15)
- Rnd 7: sc around (15)
- Rnd 8: (sc3, dec) x3 (12)
Stuff firmly as you go, adding fiberfill in small pinches rather than one large handful for the most even shape. Attach the 6mm safety eyes before closing, spacing them about 4 stitches apart on round 6, near the front of the head shaping.
Fasten off using an invisible fasten-off for a clean finish, and leave a tail for attaching the shell.
Legs (Make 4 in Cream/Tan)
- Rnd 1: 5 sc in MR (5)
- Rnd 2–3: sc around (5)
Fasten off, leaving a tail for sewing. Do not stuff the legs — a flatter, less stuffed leg attaches more neatly and gives the turtle a slightly flattened, realistic stance.
Tail (Make 1 in Cream/Tan)
- Rnd 1: 4 sc in MR (4)
- Rnd 2: sc around (4)
Fasten off, leaving a short tail for sewing.
Assembly
- Center the shell on top of the body and pin it in place before sewing, checking that it sits evenly from all angles.
- Sew the shell to the body using a whip stitch, working slowly around the entire edge to keep the seam even and hidden.
- Position the four legs symmetrically along the sides of the body, two near the front and two near the back, and pin before sewing.
- Attach the tail at the center back, just below where the shell meets the body.
- Weave in all remaining ends and trim any loose threads.
Tips for a Cleaner Finish
- Use stitch markers on every round to avoid losing track of round starts, especially on the shell where the stitch count changes frequently.
- Slightly underfill the shell compared to the body — a shell that’s too firm can look overly rounded rather than naturally dome-shaped.
- Pin before you sew. This single habit prevents the most common turtle amigurumi mistake: crooked, uneven legs.
Common Mistakes to Avoid
- Overstuffing the legs, which makes them bulge unnaturally and lose the flattened turtle-leg look.
- Attaching the shell off-center, which throws off the entire silhouette even with perfectly crocheted pieces.
- Skipping the pinning step, leading to lopsided leg placement that is hard to fix once sewn.
For general safety guidance on toy-making, especially if this turtle is meant as a gift for a young child, the Consumer Product Safety Commission’s toy safety guidance is worth reviewing before adding safety eyes to any piece intended for a child under three.
Frequently Asked Questions
How long does this mini turtle amigurumi take to make? Most crocheters finish this pattern in one to two hours, including assembly, making it one of the faster amigurumi projects to complete in a single sitting.
Can I make this turtle bigger by using a different yarn weight? Yes. Switching to a bulkier yarn and a larger hook will scale the entire pattern up proportionally, though stitch counts may need slight adjustment for the new gauge.
What if I don’t have safety eyes on hand? Embroidered eyes using dark yarn or embroidery floss work as a substitute and are actually the safer choice for amigurumi intended for very young children.
Why is my shell not sitting flat on the body? This usually means the shell was overstuffed. A lightly stuffed, slightly flexible shell conforms to the body’s curve much more naturally than a firmly packed one.
Can I felt or embroider a pattern onto the shell? Absolutely. A few simple lines of surface crochet or embroidery in a contrasting color can mimic a turtle shell’s natural segmented pattern and adds a nice finishing touch.
Final Thoughts
This mini turtle amigurumi pattern proves that a small, simple project can still feel charming and complete. With just two colors, a handful of basic shapes, and about an hour or two of your time, you’ll have a finished turtle ready for a keychain, a shelf, or a handmade gift. Once you’ve made one, the pattern is easy to remember, so a whole little family of turtles in different colors is well within reach for your next quick project.