

Most blanket patterns look intimidating on paper. Rows of symbols, confusing repeats, stitch counts that never seem to add up. This one is different from all of that. It uses just one stitch, repeated the same way, row after row. If you can chain and single crochet, you can make this blanket from start to finish.
Why This Pattern Works So Well for Beginners
The entire blanket uses a single stitch from beginning to end: single crochet. There’s no counting complicated repeats. There’s no switching between stitch types mid-row. Every row looks exactly like the one before it, which means your hands build muscle memory fast.
Because the pattern never changes from row to row, mistakes are also easy to spot right away. If a row looks different from the one below it, you’ll notice right away, long before the error becomes a real problem.
Skill Level and Time Commitment
This pattern is rated true beginner. If you know how to chain and how to single crochet, you already have every skill this project requires. A throw-sized blanket usually takes between 15 and 25 hours of crocheting, spread across several days or weeks.

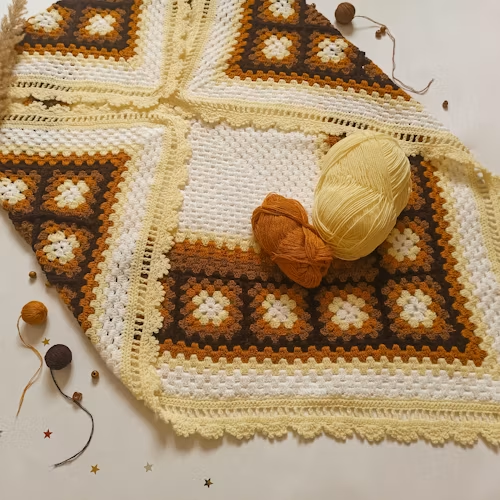
Working in front of the TV works especially well for this simple project. Since the stitch pattern never changes, you barely need to look down once you get a good rhythm going.
Materials You’ll Need
For a throw-sized blanket, roughly 40 by 50 inches, you’ll need:
- About 2,200 to 2,400 yards of worsted weight yarn (category 4)
- A size H-8 (5mm) crochet hook
- A yarn needle for weaving in ends
- Scissors
Worsted weight yarn is the most beginner-friendly choice for a first blanket. According to the Craft Yarn Council, the standard yarn weight system ranges from size 0 (lace) to size 7 (jumbo), and worsted weight sits right in the middle at size 4. That middle weight makes stitches easy to see and count, which matters a lot when you’re still learning.
Understanding Gauge (and Why It Barely Matters Here)
Gauge for this pattern runs approximately 12 single crochet stitches and 14 rows to 4 inches, using a size H-8 hook. Unlike garments, blankets are forgiving. A slightly looser or tighter gauge just changes the final size a little. It won’t ruin the project the way it might on a fitted sweater.
If you crochet a bit tighter or looser than average, don’t worry. Just keep an eye on your blanket’s width after the first few rows, and adjust your starting chain on your next attempt if needed.
Abbreviations Used in This Pattern
- ch — chain
- sc — single crochet
- st(s) — stitch(es)
- rep — repeat
Step-by-Step Instructions
Step 1: Make your foundation chain. Chain 121. This creates a blanket approximately 40 inches wide. For a narrower or wider blanket, add or subtract in multiples of 2 chains.
Step 2: Work your first row. Single crochet in the second chain from your hook. Single crochet in each chain across. Turn your work.
Step 3: Work every following row the same way. Chain 1. Single crochet in each stitch across the row. Turn. Repeat this row until your blanket measures about 50 inches long, or your desired length.
Step 4: Check your edges as you go. Every few rows, lay the blanket flat and glance at the side edges. They should form a straight line. If you notice the edges pulling in or flaring out, you’re likely gaining or losing a stitch somewhere in the row.
Finishing Your Blanket
Once your blanket reaches the length you want, fasten off and leave a six-inch tail. Thread that tail onto your yarn needle and weave it through several stitches on the wrong side of the work. Trim the excess yarn.
For a clean, finished look, add a simple border. Work one round of single crochet evenly around all four sides, placing three single crochet stitches in each corner to keep the corners from puckering.
Adjusting the Size for Different Projects
This same basic pattern scales up or down easily, since it’s just chains and single crochet rows. Use this rough guide for common sizes:
- Baby blanket: chain 91 (about 30 inches wide), work until 36 inches long
- Lap blanket: chain 106 (about 35 inches wide), work until 45 inches long
- Throw blanket: chain 121 (about 40 inches wide), work until 50 inches long
- Twin-size blanket: chain 181 (about 60 inches wide), work until 90 inches long
Keep in mind that larger sizes use significantly more yarn. A twin-size blanket, for example, often needs close to double the yarn of a standard throw.
Choosing the Right Yarn Fiber for Your First Blanket
Beyond weight, the fiber content of your yarn matters too. Acrylic yarn is often the best choice for a first blanket. It’s affordable. It’s machine washable. It’s also widely available in craft stores. Cotton, on the other hand, tends to be heavier and less stretchy. That can make long crochet sessions harder on your hands.
Wool blends offer a warmer, softer finished blanket. But they generally cost more. They often require gentler washing too. For a first project, many crocheters find that a basic acrylic or acrylic-cotton blend strikes the best balance. Cost, comfort, and easy care all line up well.
Ultimately, the best yarn is one you’ll actually enjoy working with for many hours. Since this project takes a while to finish, picking a color and texture you love matters just as much as the technical specs.
How Long It Really Takes, Row by Row
Based on the gauge listed above, a typical throw-sized blanket runs about 175 rows from start to finish. Once you settle into a rhythm, most beginners complete somewhere between 8 and 12 rows per hour. It depends on how often you pause to check your work.
That means a realistic total time investment sits between 15 and 22 hours for the whole blanket. Spread across a few weeks of evening crocheting, that pace feels comfortable rather than rushed. It also leaves plenty of room to set the project down. You can pick it back up later without losing momentum.
Common Beginner Mistakes (and How to Fix Them)
The most frequent issue new crocheters run into is accidentally skipping the first or last stitch in a row. This happens easily, since the turning chain can look like a stitch itself at first glance. Always count your stitches at the end of each row for the first several rows, until the habit feels automatic.
Another common mistake is working too tightly, especially in the first few rows. Tension usually relaxes naturally as you get more comfortable, so don’t worry if your early rows look a bit stiffer than the rest of the blanket.
Finally, many beginners lose track of which row they’re on after taking a break. A simple row counter, or even a note on your phone, saves a lot of frustration compared to guessing later on.
How to Make This Pattern Even Easier
If counting stitches feels stressful at first, work in shorter sessions rather than trying to power through many rows at once. Twenty or thirty minutes at a time, done consistently, adds up faster than people expect, and it keeps the project feeling relaxing instead of like a chore.
It also helps to choose a yarn in a solid, medium color for your very first attempt at this pattern. Dark colors hide stitch definition, making it harder to see your work clearly. Busy variegated yarns, meanwhile, can make it difficult to spot mistakes until many rows later on.
Caring for Your Finished Blanket
Most acrylic yarn blankets are machine washable on a gentle cycle setting. Always check the yarn label first, though, since fiber blends can change the care instructions significantly from one skein to the next. Cold water and a mild detergent keep colors from fading over time.
When it comes to drying, lay the blanket flat whenever possible instead of using a dryer. High heat can cause acrylic fibers to lose their softness over time, and it can shrink wool blends unexpectedly. A little patience during the drying stage protects all the hours you put into making it.
Frequently Asked Questions
Can I use a different hook size than the one listed in this pattern?
Yes. A smaller hook creates a tighter, denser fabric, while a larger hook creates a looser, drapier one. Just remember that changing hook size also changes your gauge, so your final blanket size will shift accordingly.
Why does my blanket curl at the edges?
Mild curling is normal with single crochet stitches and usually relaxes once the blanket is finished and has some weight to it. Blocking, which means lightly wetting the finished piece and laying it flat to dry, helps flatten any remaining curl.
How much yarn should I buy to be safe?
Buy about 10 percent more than the estimated yardage for your chosen size. Running out of a specific dye lot partway through a large project is a common and frustrating problem, and a small buffer avoids it entirely.
Final Thoughts
An easy crochet blanket pattern doesn’t need fancy stitches to look beautiful. This single crochet version proves that a repeated, simple technique can produce a genuinely cozy, finished-looking throw. Once you’ve completed one, you’ll have the confidence and the muscle memory to try slightly more advanced stitch patterns on your next project.
Give yourself permission to go slowly on this very first attempt. The skills you build here, steady tension, even stitch counts, comfortable pacing, will carry over into every crochet project you make after this one is done.